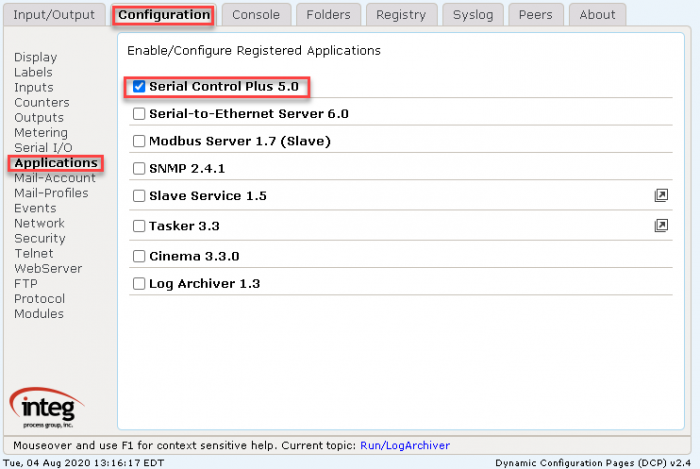
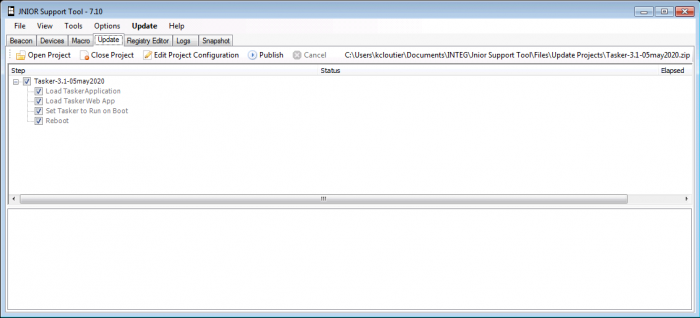
As long as the device you are sending to can create TCP or serial connections, the JNIOR should be able to send commands to it. If you are starting from scratch with a JNIOR, you’ll need to download the JNIOR Support Tool and the Cinema update project. The JNIOR Support Tool allows you to install update projects on JNIORs, and the Cinema update project installs the Cinema application, which is what listens for commands to activate JNIOR macros.

Name Version Release Date Size MD5
JNIOR Support Tool v7.15 Nov 20 2023 9.9 MB d9f2ddfb2bcd13a886316d61d8909ea1
Cinema.jar - Update Project v6.9 Jan 03 2024 545.1 KB 0a2c670e461116768b75288e652c5253

To update your JNIOR with an update project, here is a link to a post on our site that shows how to install Cinema.

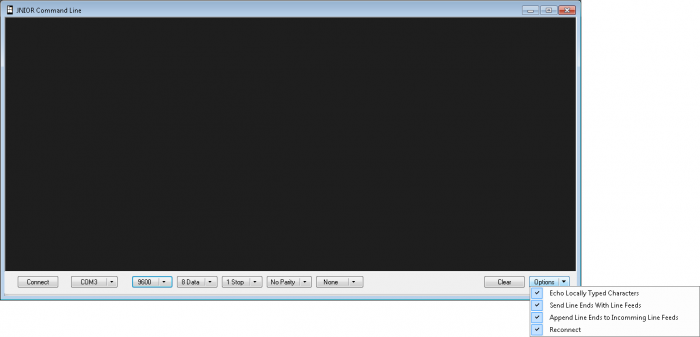
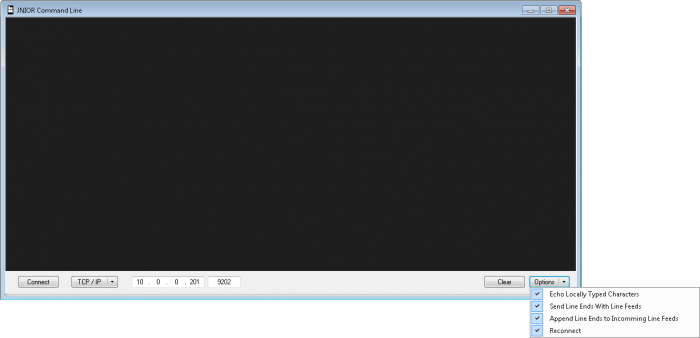
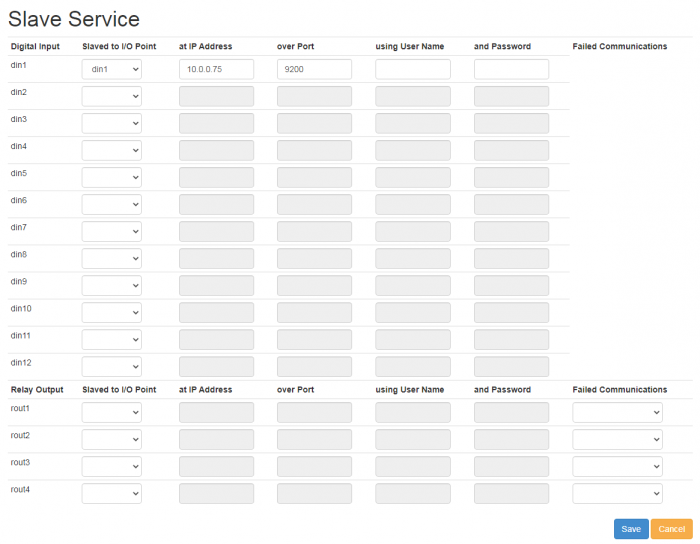
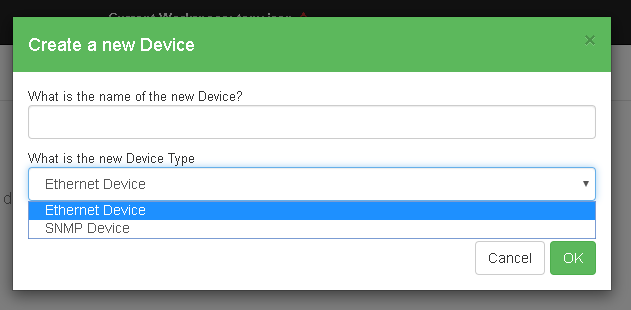
Once the Cinema update project has been published to your JNIOR, we’ll now need to create a device in the support tool to send to. In the support tool, you’ll go to the device tab and select add. You can select the device and rename it. After that you’ll now configure the settings of the device so we can send macros to it. To start you’ll select your device type, and if you see the device you want to send to there you’ll select it. If not you’ll select Raw Ethernet for a TCP connection or Raw Serial for a serial connection. You’ll then set the rest of the device configuration according to the device’s TCP or serial settings.

Once you finish setting the device information, you’ll then want to save the device file by clicking the Save As button. After that you’ll then publish the file to the JNIOR you are using by clicking the Publish to JNIOR button.

After you’ve done that, we’ll now create the macro that will be sent to the device that will contain the text command. Going back to the support tool, you’ll go to the macro tab.

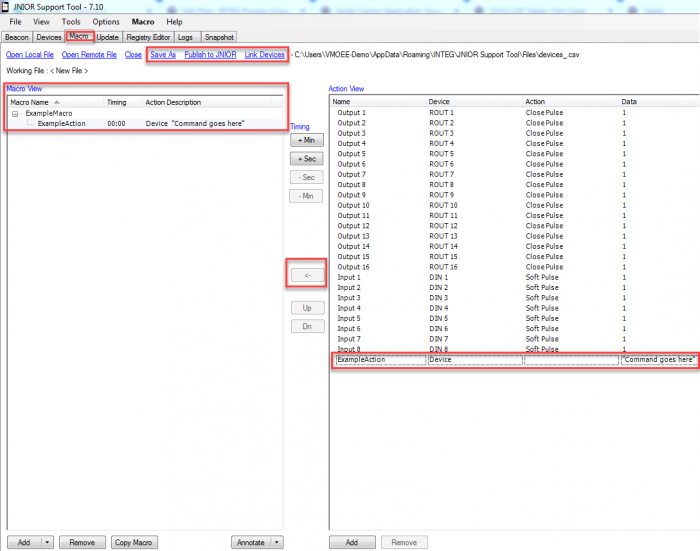
The first thing we’ll want to do here is click the “Link Devices” button at the top. Here we’ll select the device file we just created, so we can reference it in our action for the macro we are going to create.

After completing that, at the bottom left corner of the macro view and you’ll select add/macro. A new macro should populate the macro view, and you can then click on it and rename it. I’m going to name it ExampleMacro.

Once you’ve done that you’ll now go to the action view and select the add button there. A new action should appear in the action view. You can rename this if you’d like, and then we’ll want to select the device we previously created in the Support Tool to send to. Lastly, in the data field you’ll want to enter the text command you wish to send to the device. If you are using a Raw Serial/Raw Ethernet device, make sure you include the termination string at the end of your text command for the device you are sending to.

Once that is finished, make sure you add the action we created to the macro we created. You do this by selecting the macro, then the action, followed by the arrow between the macro and action view.

Lastly, like we did with the device file, we’ll save this using the Save As button, followed by publishing it to the correct JNIOR using the Publish to JNIOR button.

Macro tab for JNIOR Support Tool

Now the JNIOR has a macro created that will send the text command to your specified device!

Name Version Release Date Size MD5
JNIOR Supporter v1.0 Jan 08 2024 2.3 MB cff040d0e79f9e6b3d45ea59c02c8ef1

For a while now, we wanted to provide a cross-platform version of the JNIOR support tool to allow all users to access their JNIOR’s easily. There are also several aspects of the Support Tool that we wanted to improve upon. With that said, we are happy to release the JNIOR Supporter!

Features

Cross-Platform – The JNIOR Supporter provides cross-platform functionality. All users will enjoy the same experience regardless of the platform that they are using. The only requirement is that you have a valid Java Runtime Environment. .

New Interface – While looking familiar to the JNIOR support tool, the JNIOR Supporter has a new interface making it easier to view and interact with your JNIORs on the network. Information is displayed more openly to see issues or notices from JNIORs, and menus have been simplified to enhance ease of use.

Updated Features – The JNIOR Supporter introduces improved features such as sorted snapshots making them easier to find and more displayed information to for JNIOR’s on the network.

View Logs – Users can now view logs from the support tool in a pop-up dialog by right clicking on a JNIOR in the Beacon tab instead of needing to reach the JNIOR’s web page

Sorted Snapshots – Snapshots are shown in a tree view and are shown in each of three categories allowing the user to easily find snapshots that we taken for a certain JNIOR based on serial number or hostname or based on when snapshots were taken by day.

Simultaneous Snapshots – Multiple Snapshots can now be taken simultaneously to speed up the process of backing up your site’s JNIOR ecosystem.

Multiple Update Projects – Multiple Update Projects can be opened at the same time so no longer have to close one Update Project to open another.  Care must be taken to not push conflicting updates to the same JNIOR.

Feedback

We want to know what you think of this new support tool. We know that change is not always easily accepted. Please let us know what you think of it and how we can add/improve to this application. If you have questions or assistance with the application, feel free to contact us. You can do so by joining our support chat on our website, emailing us at support@integpg.com or calling the office at 724-933-9350.

JANOS has implemented a set of time zones that are available but in no means is this a complete list.  There are many territories in the world that either do not observe the time zone that they geographically belong to or they have different rules.  Some locations differ the time zone rules by 30 or even just 15 minutes.  Sometimes governments alter their policies and change the rules that have been in place for years or decades.

This article will describe how to create a new time zone with a DST rule as described in the JANOS Registry Documentation under section 9.2.

The clock subsystem is generally configured using the DATE command. JANOS defines a set of time zones for use in displaying local time. These time zones may or may not utilize Daylight Savings Time (DST).

As there are 24 hours on our clock one might expect that there needs to be only 24 time zones. This however is not the case as some areas offset their clocks by just 30 minutes. In addition, some areas utilize DST while others do not. The following is the default set of time zones. This can be displayed at any time using the DATE -T command.

date command for JNIOR command line

This default list of time zones is likely incorrect for some areas across the globe. INTEG encourages users to let us know when a correction to the timezone tables might be appropriate. JANOS does provide a means by which you may define new time zones with or without DST rules. You may even correct an existing timezone. This is accomplished using one or more Time zones/<name> Registry entries.

Use of a website like timeanddate.com is very helpful for the validation and creation of time zones.

Here I will show you how to create a new Time Zone for Aukland New Zealand.  Timeanddate.com gives us all the information we need in this screenshot.

Information for timezone creation

We see that they are currently observing Daylight Savings Time and will be throughout the beginning of next year since New Zealand is in the Southern Hemisphere.  So now we can follow the following format to build a registry key for the new time zone we will create.

reg Timezones/<name> = <offset>, <desc>, <AbbStd> [, <AbbDst>,
       <stMon>, <stDay>, <stDoW>, <stTime>,
       <endMon>, <endDay>, <endDoW>, <endTime>, <dstOfs>]

We will need to use the full format in order to get the daylight savings time rules implemented. To do this we can enter the following at the command line.

reg timezones/NewZealand = "+1200, New Zealand/Aukland, NZST, NZDT, 
       SEP, 27, SUN, 200, 
       APR, 5, SUN, 200, 60"

The registry tab could also have been used to create the key. That would look like this…

In either case we get the same result. We can now issue the date -t command to see our newly created time zone.

date -t command for JNIOR command line

A reboot is needed to complete the registration of our newly created time zone.  After the reboot there is only one more thing to do.  Tell the JNIOR to use it.  For example, date NZST.

There you go!  The new time zone has been created and the JNIOR is now using it.  As mentioned above, it is recommended to tell INTEG of missing or incorrect time zones so that we can put it in the JNIOR but creating a custom time zone will get your JNIOR to start using the new rules immediately. 

As always, thanks for using the JNIOR!

The Beacon tab shows you information about the JNIORs that were found.  The Beacon technology uses UDP over port 4444.  A UDP broadcast is used when discovering JNIORs on the network.  UDP broadcasts are usually blocked by routers therefore restricting the UDP broadcast to the local segment of the network.

Beacon Tab of the JNIOR Supporter

Right-click for options

Right-clicking presents you with actions that can be taken for the selected JNIOR.

  • Query All – Broadcasts the Query message to the Network to ask JNIORs to report back
  • Query – Broadcasts a query message to only the selected JNIOR on the network.
  • Identify – This will flash the amber status LED on the selected JNIOR for a few seconds. 
  • Set Hostname – A prompt will be presented asking for the new Hostname.  The current Hostname will be pre-filled.
  • Enable DHCP – Enables Dynamic Host Configuration Protocol (DHCP). Rather then manually setting the IP of the JNIOR, if the network the JNIOR is connected to has DHCP enabled, it scans the network for valid IP addresses that aren’t already taken and assigns one to the JNIOR.
  • Configuration – The Network Configuration dialog will be displayed.  The choice between DHCP and static addressing.  If a static IP Address is chosen then you will have the ability to enter IP Address, Subnet Mask, Gateway Address and DNS Servers.
  • Reset Attention Flag – Attention flags are messages that are displayed in the Message column of Beacon. Selecting this will clear all messages in the Message column of Beacon. (If errors are being thrown they will re-populate until they are dealt handled.)
  • Reboot – This will reboot the JNIOR. Rebooting will make the JNIOR disappear from Beacon for a brief moment.
  • Launch WebUI- This will launch the main web user interface for monitoring and controlling the I/O as well as general JNIOR configuration.
  • Open Telnet – Opens a telnet session for console level access. Here is a link to different telnet commands a JNIOR can be given.
  • Task a Snapshot – Initiates the Snapshot process. A snapshot is a copy of a JNIOR configuration, downloaded as a Zip File. These can be used to move configuration from one JNIOR to another, or to debug/troubleshoot JNIORs.
  • Show jniorsys.log – Loads the jniorsys.log.bak and jniorsys.log files into a dialog for real-time viewing.
  • Show/Remove errors.log – With these options you can either load the errors.log.bak and errors.log files into a dialog for real-time viewing, or remove them from the JNIOR.  This option is only enabled if the Attention flag indicates that there is an errors file.
  • Show/Remove dump.log – With these options you can either load the dump.log.bak and dump.log files into a dialog for real-time viewing, or remove them from the JNIOR.  This option is only enabled if the Attention flag indicates that there is a dump file.
  • Copy Field – Copies the data inside the field that is selected in Beacon. This is to easily grab values from the Beacon tab if needed.
Name Version Release Date Size MD5
JNIOR Supporter v1.0 Jan 08 2024 2.3 MB cff040d0e79f9e6b3d45ea59c02c8ef1

The JNIOR Supporter is the new cross-platform version of the JNIOR Support Tool.  Being cross-platform allows the JNIOR Supporter to run on any Desktop with a valid Java Runtime Environment loaded.  Windows, Linux or Mac machines can now run the JNIOR Supporter tool.

Many of the same features have been implemented that current users of the JNIOR Support Tool are used to.  The Beacon, Snapshot and Update tabs have all been ported over.  There are a few tweaks to appearance and functionality but current users should have a good level of comfort.

JNIOR supporter for JNIOR automation controller

Beacon

The Beacon Tab allows you to view the JNIORs that are connected to your local segment of your network.  This works using UDP broadcasts to find JNIORs that may not have the same IP scheme as the host machine that is running the JNIOR Supporter tool.  In this case TCP connections do not work but the JNIOR Supporter will help you to set up the correct network configuration settings needed for your network.

Snapshot

Snapshots largely work as the did before with the exception being that multiple Snapshots can be performed at the same time.  This saves time.  Lots of time.  There is also new ways to view the Snapshots you have in your library.  Your Snapshots will be categorized by Serial Number, By Hostname and by Date.

Update

Updates also work much like they did before.  Updates can be published to multiple JNIORs as they did before as well.  But, now you can open multiple Update Projects at the same time.

Serial Control Plus is an application that comes pre-installed on all JNIORs. It allows you to connect either serially or through TCP to a JNIOR, and give it commands to activate the JNIOR’s I/O. This post will explain how to setup and use Serial Control Plus on your JNIOR.

As mentioned before Serial Control Plus is already pre-installed on all JNIORs. To activate it, you need to go to the JNIOR DCP. This can be accessed by either right clicking the JNIOR in the JNIOR Support Tool and going to Tools/Open Web Page, or by typing the JNIOR’s IP address into the URL of your computer’s web browser. Once on the DCP, you’ll go to the applications section on the configuration tab and click the checkbox next to Serial Control Plus and reboot your JNIOR. This will allow you to use Serial Control Plus on that JNIOR.

Configuration tab for the JNIOR Web Page

Once you have activated the Serial Control Plus application on your JNIOR, you can now send commands to the JNIOR through it. We are going to open the command line from the support tool to activate commands on this JNIOR for this example. To open the command line from the Support Tool, you’ll go to the Tools bar at the top of the Support Tool and select Command Line.

Command Line button on Support Tool

Once you have the command line open, you’ll need to configure the settings of the command line to send commands to the JNIOR. To have the right settings to communicate with the JNIOR, we need to select how we communicate to the JNIOR. Serial Control Plus can communicate with the JNIOR two ways. Either you can connect to the JNIOR with a serial connection or a TCP connection.

To connect serially with the JNIOR, you need to plug a serial cable into the Aux Port of the JNIOR. Once you do that we need to select the correct settings in the command line window. As in the picture below, next to the connect button for the connection type you’ll select COM, baud type is 9600, Data bits is 8, Stop bits is 1, Parity is none, and hardware/software is set to none. For the Option drop-down, select all the choices.

serial settings for JNIOR telnet session

To connect through TCP, you just need the JNIOR to be on the network to connect. As in the picture below next to the connect button for the connection type you’ll select TCP/IP, you’ll set the JNIOR’s IP, and the Port to connect on is 9202. For the Option drop-down, select all the choices.

TCP settings for JNIOR telent session

Once you’ve decided on your connection type and configured the command line accordingly, you should be able to send commands to the JNIOR. Here are commands for controlling and monitoring I/O.

Controlling I/O

The following commands can be used to close, open and pulse outputs.

cX: Close the output (relay is “on” closing the contact)
where x = 1 through 8 for the internal relay outputs on the JNIOR
and x = +1 through +8 for the external relay outputs on the 4 Relay Output Expansion Modules

oX: Open the output (relay is “off” opening the contact)
where x = 1 through 8 for the internal relay outputs on the JNIOR
and x = +1 through +8 for the external relay outputs on the 4 Relay Output Expansion Modules

p=yyy Pulse duration (milliseconds) and is used in conjunction with the ‘close’ or ‘open’ command


Examples:
c2p=1000 close output 2 for 1 second and then open again
c+2p=1000 close output 10 for 1 second and then open again
o3p=10000 open output 3 for 10 seconds and then close again
c* Close all outputs at the same time (includes internal and external)
o* Open all outputs at the same time (includes internal and external)


These commands can be abbreviated and used in combination, such as:
c1 close relay output 1
c+1 close relay output 9 (first output on first expansion module)
c+5 close relay output 13 (first output on second expansion module)
c1+1+5 combination of the above all in one command
c1234 close relay outputs 1 through 4
c1368 close relay outputs 1, 3, 6, 8
o125 open relay outputs 1, 2, 5
c1+1p=1000 close relay outputs 1, 9 and pulse each for 1 second simultaneously

Monitoring I/O

Whenever an input (or output) changes status (low-to-high or high-to-low), the following is sent out by the JNIOR:

INx=1 Input x (1 – 8) has gone high (on)
OUTx=1 Output x (1 – 16) has gone high (on)
INx=0 Input x (1 – 8) has gone low (off)
OUTx=1 Output x (1 – 16) has gone low (off)


The default setting for the Registry Key AppData/Serial_Control/SendCounts is false. If you change this key to true and reboot, with each message stating the input status, a count value will also be included. Whenever an input changes status (low-to-high or high-to-low), the following is sent out by the JNIOR:

INx=1,yyy Input x (1 – 8) has gone high (on), counter value = yyy
INx=0,yyy Input x (1 – 8) has gone low (off), counter value = yyy


Note: These monitoring messages are sent out individually over the serial port or Ethernet. The JNIOR does not report the status of more than one input/counter in the same message.

With this, you should now be able to use Serial Control Plus to control and monitor a JNIOR’s I/O!

Name Version Release Date Size MD5
Tasker v3.3 Jul 30 2020 1.0 MB 5783b3bda071222b48775e5ffb9e4b3d
  • [+] adding duplicate instance check
  • [+] variables that start with :: shall be global
  • [+] add TCP Recv
  • [+] add TCP Close
  • [+] new execute script action
  • [+] uses new scripting engine
  • [!] fixed issue where dst timezone was not being logged
  • [+] adding action to prepend to file
  • [+] adding retry logic to external identifier objects. included creating external identifier parent class
  • [+] adding action to copy file
  • [+] adding action to move file
  • [+] add ascii tcp and serial servers for tasker control
  • [~] now preventing spaces in workspace names. current workspace files with spaces will be renamed with an UNDERSCORE

Go to the Tasker Application page for more information. The Tasker Knowledge-base has helpful information on how to use the features in Tasker.

Tasker 3.2 June 18, 2020

Name Version Release Date Size MD5
Tasker v3.2 Jun 18 2020 958.1 KB 953712536000b330ad267047b7ee274d
  • + added 4-20ma modules
  • + added 10v modules
  • + added email send attachment option

Go to the Tasker Application page for more information. The Tasker Knowledge-base has helpful information on how to use the features in Tasker.

Tasker 3.1 May 1, 2020

Name Version Release Date Size MD5
Tasker v3.1 May 05 2020 942.1 KB 47e03374e8a8791ec0a922f38e62f174
  • Added If / Else Block Task Action
  • Added While Loop Task Action
  • Added SNMP Trap Task Action - Tutorial
  • Help pages are in progress
  • Upload and download workspaces
  • Delete a workspace (Workspace is backed up)

Go to the Tasker Application page for more information. The Tasker Knowledge-base has helpful information on how to use the features in Tasker.

Tasker 3.0 April 20, 2020

It has been a while since Tasker was released. Tasker was a quick attempt at making a replacement for the Task Manager application that has been around for more than a decade, starting on the Series 3.

Ample time has now been taken to create a fully capable application that will be every bit as functional as Task Manager but offer the benefits of a rewrite, using configuration files and the latest web technology.

Some of the changes and new features are as follows:

  • Faster– The tasks are executed much faster and the triggers and schedule are monitored in real-time instead of once every 5 – 10 seconds.
  • Workspaces - Separate configuration logic into multiple workspaces. Then multiple workspaces can be loaded on the JNIOR at the same time.
  • Tasks are now separate from triggers. In Task Manager a Task was created and a Trigger was configured to get the Task to execute. In Tasker 3.0 Tasks are a separate entity that can be executed several different way including manual execution from the configuration page and being requested via an ASCII TCP connection.
  • Tasks can now send data via an Ethernet connection. To do this, a Device must be created so that the action can specify which device to send the data to. Multiple devices can be configured.
  • New Actions – We implemented actions that were previously available in Task Manager but are introducing many new actions like external module control, TCP communication and control structures.
  • Drag n Drop – Drag and Drop functionality makes it easier to design your Task logic.
  • Signals are now created to assign a specific property of a I/O point or sensor a name. The name can then be used in Tasks, Triggers or Loggers.
  • Loggers can be created to define the file name and schema or what data should be logged to that file. Each line in a Logger will be prepended with a timestamp followed by a comma. Loggers also allow you to define the number of files that should be kept with the given naming pattern. Name patterns can include date patterns. This will help you create a file per day for example.
  • Schedule – The schedule has additional options.
  • JSON Configuration files are used now instead of registry keys. Registry keys were limiting in size. The Series 3 could only store 255 characters in a registry key. It is much easier to upload configuration files to other JNIORs to replicate setups.
  • User Interface – The User Interface is now a native HTML application that uses the latest web technology. The latest web technology uses native HTML controls and Web-sockets to communicate with the JNIOR from your browser. This will allow accessibility over remote connections as long as port 80 is available. This is now consistent with the communication method used by the DCP. Task Manager had always used Java Applets. The Java Applets have not been able to launch in browsers for several years as they became frowned upon as security vulnerabilities.

This was just a short list of changes and new features. The documentation for Tasker should explain these topics as well as many others. If there is anything you don't understand please reach out to us for help. Additionally, if you have any suggestions or need the JNIOR to do something specific for you, please let us know.

For more information go to the Tasker Page

The series 3 JNIORs used the Java Applet as a GUI. Years ago the browsers stopped supporting Java Applets due to security concerns. You are no longer able to open the series 3 Java Applet GUI in most browsers. You can still access it by launching it locally since it is installed as part of the JNIOR Support Tool. The security concerns over java applets are not present when launching the Java Application locally. Here is how to access the Java Applet for a JNIOR.

NOTE: The Java Applet GUI should only be used with series 3 JNIORs. The Java Applet GUI requires that your computer has Java installed. You can check if your computer has java by opening you command line and entering java -version. Here is a link to different JDK options.

First, make sure you have the JNIOR support tool downloaded. Here is a link for it.

Name Version Release Date Size MD5
JNIOR Support Tool v7.15 Nov 20 2023 9.9 MB d9f2ddfb2bcd13a886316d61d8909ea1

Once you have downloaded the Support Tool, you’ll want to open it and find the JNIOR you wish to access the Java Applet for in the Beacon tab. Then by right clicking it, you’ll then go to Tools/Classic Monitor, Configuration, Control Application option and select it.

After selecting this for, the Java Applet for your JNIOR should open.

Java Applet for Series 3 JNIORs
Name Version Release Date Size MD5
Slaving Service v2.0 Jul 23 2020 183.2 KB e6f139ce51cdf79c5c05845285cd7eb4

[+] Added the ability to control the inputs based on Local or Remote I/O

[+] Added a section to the web page for configuring the inputs

Name Version Release Date Size MD5
Grapher v4.1 Jun 18 2020 788.5 KB 75e992513636e0c45c7aa7f71d8c1303

! Fixed bugs.

Grapher 4.0 - A change in navigation August 23, 2019

Name Version Release Date Size MD5
Grapher v4.0 Aug 22 2019 783.4 KB a7967fd9878171af565ff1faf677ae14

Several changes affecting how you navigate in time.

Added the ability to change the configured duration view of the graph. Previously the default was a hard-coded 4 hours. Once you brought up the graph you could have used the mouse wheel to zoom out or zoom in. The graph would always load showing the past 4 hours.

In this version we removed the ability to zoom in and out using the mouse wheel. We also removed dragging the graph in the future or past using the mouse. This was done because it was noted that too often the mouse is accidentally being used to modify the graph view.

Since the mouse interaction was removed to zoom and pan, we added buttons below the graph the facilitate the ability to move forward and backward in time.

The fast step buttons move the graph forward or backward by the entire duration. If you are looking at today, as shown below, pressing the fast backwards button will show you yesterday. The single step buttons move by 1/4 the duration. Looking at 24 hours and pressing the single step buttons will move the graph by 6 hours.

! Corrected an issue where opening an update project would encounter a non-empty temp folder.

+ Added the ability to open multiple Device files

+ Added the ability to open multiple Macro files

+ Added the ability to open multiple Update Projects

! addresses an issue where the Update Notification was always being shown at startup, even when the most recent version was on the JNIOR.

JNIOR Support Tool 7.9 May 16, 2019

  • The JNIOR Support Tool version 7.9 addresses an issue with new installs.  The C:\INTEG\JNIOR Support Tool directory was not getting created upon install.  This would prevent the Support Tool from opening.
  • Also in this update is a selection for the new Barco Series 4 projector.

The following post talks about entering the processor bootloader.  Entering the bootloader could have unintended consequences should the wrong commands be entered.  Proceed at your own risk.

Note, this is for a series 3 JNIOR that went out of production in 2015. You can upgrade to Series 4 JNIORs easily in most cases.

Most JNIOR3 batteries should be dead and therefore removing power to reboot should restore the default accounts. If the battery is still doing its job you can force your way in using the following:

  1. Connect USB-to-Serial cable to COM/RS-232 port.
  2. Open Terminal program of your choice (Support Tool). Serial settings are 115200 baud, 8 data bits, 1 stop bit, and No Parity. No hardware buffer control. We are hoping that the DTR line (pin 4) is wired through the cable and is asserted by default.
  3. Access the JNIOR and prove to yourself that you cannot log in. Try jnior:jnior and admin:admin.
  4. With jumper (or screwdriver) short jumper next to COM port briefly (1/2 second).
  5. Immediately hit repeated (at least 3 or so) ENTER keystrokes. The bootloader banner should appear.
  6. Enter: B 02 <ENTER>
  7. Enter: F 00 0000 0100 <ENTER>
  8. Enter: E <ENTER>
  9. The JNIOR should reboot. Note the above switches to the Block for the Heap Memory (Bank 2); Clears the first 256 bytes of the Heap damaging its structure; And, then Exits restarting the system.
  10. Note in the dialog the indication “Blast HEAP”. This restores the original /etc/passwd file with the default credentials.
  11. Eventually log in using jnior:jnior

If shorting the jumper pins or inserting the jumper briefly does not reboot the JNIOR and accept your ENTER keystrokes, then DTR is not wired or asserted.

This test was done using Putty on an Ubuntu system with an old USB-to_Serial adapter.

Name Version Release Date Size MD5
Tasker v3.2 Jun 18 2020 958.1 KB 953712536000b330ad267047b7ee274d
  • + added 4-20ma modules
  • + added 10v modules
  • + added email send attachment option

Go to the Tasker Application page for more information. The Tasker Knowledge-base has helpful information on how to use the features in Tasker.

Tasker 3.1 May 1, 2020

Name Version Release Date Size MD5
Tasker v3.1 May 05 2020 942.1 KB 47e03374e8a8791ec0a922f38e62f174
  • Added If / Else Block Task Action
  • Added While Loop Task Action
  • Added SNMP Trap Task Action - Tutorial
  • Help pages are in progress
  • Upload and download workspaces
  • Delete a workspace (Workspace is backed up)

Go to the Tasker Application page for more information. The Tasker Knowledge-base has helpful information on how to use the features in Tasker.

Tasker 3.0 April 20, 2020

It has been a while since Tasker was released. Tasker was a quick attempt at making a replacement for the Task Manager application that has been around for more than a decade, starting on the Series 3.

Ample time has now been taken to create a fully capable application that will be every bit as functional as Task Manager but offer the benefits of a rewrite, using configuration files and the latest web technology.

Some of the changes and new features are as follows:

  • Faster– The tasks are executed much faster and the triggers and schedule are monitored in real-time instead of once every 5 – 10 seconds.
  • Workspaces - Separate configuration logic into multiple workspaces. Then multiple workspaces can be loaded on the JNIOR at the same time.
  • Tasks are now separate from triggers. In Task Manager a Task was created and a Trigger was configured to get the Task to execute. In Tasker 3.0 Tasks are a separate entity that can be executed several different way including manual execution from the configuration page and being requested via an ASCII TCP connection.
  • Tasks can now send data via an Ethernet connection. To do this, a Device must be created so that the action can specify which device to send the data to. Multiple devices can be configured.
  • New Actions – We implemented actions that were previously available in Task Manager but are introducing many new actions like external module control, TCP communication and control structures.
  • Drag n Drop – Drag and Drop functionality makes it easier to design your Task logic.
  • Signals are now created to assign a specific property of a I/O point or sensor a name. The name can then be used in Tasks, Triggers or Loggers.
  • Loggers can be created to define the file name and schema or what data should be logged to that file. Each line in a Logger will be prepended with a timestamp followed by a comma. Loggers also allow you to define the number of files that should be kept with the given naming pattern. Name patterns can include date patterns. This will help you create a file per day for example.
  • Schedule – The schedule has additional options.
  • JSON Configuration files are used now instead of registry keys. Registry keys were limiting in size. The Series 3 could only store 255 characters in a registry key. It is much easier to upload configuration files to other JNIORs to replicate setups.
  • User Interface – The User Interface is now a native HTML application that uses the latest web technology. The latest web technology uses native HTML controls and Web-sockets to communicate with the JNIOR from your browser. This will allow accessibility over remote connections as long as port 80 is available. This is now consistent with the communication method used by the DCP. Task Manager had always used Java Applets. The Java Applets have not been able to launch in browsers for several years as they became frowned upon as security vulnerabilities.

This was just a short list of changes and new features. The documentation for Tasker should explain these topics as well as many others. If there is anything you don't understand please reach out to us for help. Additionally, if you have any suggestions or need the JNIOR to do something specific for you, please let us know.

For more information go to the Tasker Page

Tasker is an add-on application. This means that Tasker is not loaded on the JNIOR before we ship it. This may change in the future.

To load Tasker you will need to get the JNIOR Support Tool and the Tasker update project.

Once you have installed the JNIOR Support Tool, open it and go to the Update tab. Here we will open the Tasker update project that was downloaded. Do not unzip the update project file. You should see the following…

This image shows the Update project for Tasker version 3.1 from May 5th 2020

Click Publish and select the JNIOR or JNIORs that you wish the load the Tasker Application on to. The Update project will run until all of the selected JNIORs have been updated.

Once complete, you can go to the Tasker Web Application in your browser. Simply go to http://JNIOR_IP_ADDRESS/tasker.

Name Version Release Date Size MD5
Tasker v3.1 May 05 2020 942.1 KB 47e03374e8a8791ec0a922f38e62f174
  • Added If / Else Block Task Action
  • Added While Loop Task Action
  • Added SNMP Trap Task Action – Tutorial
  • Help pages are in progress
  • Upload and download workspaces
  • Delete a workspace (Workspace is backed up)

Go to the Tasker Application page for more information. The Tasker Knowledge-base has helpful information on how to use the features in Tasker.

Tasker 3.0 April 20, 2020

It has been a while since Tasker was released. Tasker was a quick attempt at making a replacement for the Task Manager application that has been around for more than a decade, starting on the Series 3.

Ample time has now been taken to create a fully capable application that will be every bit as functional as Task Manager but offer the benefits of a rewrite, using configuration files and the latest web technology.

Some of the changes and new features are as follows:

  • Faster– The tasks are executed much faster and the triggers and schedule are monitored in real-time instead of once every 5 – 10 seconds.
  • Workspaces - Separate configuration logic into multiple workspaces. Then multiple workspaces can be loaded on the JNIOR at the same time.
  • Tasks are now separate from triggers. In Task Manager a Task was created and a Trigger was configured to get the Task to execute. In Tasker 3.0 Tasks are a separate entity that can be executed several different way including manual execution from the configuration page and being requested via an ASCII TCP connection.
  • Tasks can now send data via an Ethernet connection. To do this, a Device must be created so that the action can specify which device to send the data to. Multiple devices can be configured.
  • New Actions – We implemented actions that were previously available in Task Manager but are introducing many new actions like external module control, TCP communication and control structures.
  • Drag n Drop – Drag and Drop functionality makes it easier to design your Task logic.
  • Signals are now created to assign a specific property of a I/O point or sensor a name. The name can then be used in Tasks, Triggers or Loggers.
  • Loggers can be created to define the file name and schema or what data should be logged to that file. Each line in a Logger will be prepended with a timestamp followed by a comma. Loggers also allow you to define the number of files that should be kept with the given naming pattern. Name patterns can include date patterns. This will help you create a file per day for example.
  • Schedule – The schedule has additional options.
  • JSON Configuration files are used now instead of registry keys. Registry keys were limiting in size. The Series 3 could only store 255 characters in a registry key. It is much easier to upload configuration files to other JNIORs to replicate setups.
  • User Interface – The User Interface is now a native HTML application that uses the latest web technology. The latest web technology uses native HTML controls and Web-sockets to communicate with the JNIOR from your browser. This will allow accessibility over remote connections as long as port 80 is available. This is now consistent with the communication method used by the DCP. Task Manager had always used Java Applets. The Java Applets have not been able to launch in browsers for several years as they became frowned upon as security vulnerabilities.

This was just a short list of changes and new features. The documentation for Tasker should explain these topics as well as many others. If there is anything you don't understand please reach out to us for help. Additionally, if you have any suggestions or need the JNIOR to do something specific for you, please let us know.

For more information go to the Tasker Page

--- Core ---
JANOS 1.9 UPDATED

DCP 2.4

--- Bundled ---
FTP Client
MODBUS Server 1.7.236
Serial Control 5.0.122.1501
Serial To Ethernet 6.0.48
Slaving Service 1.5.1810.225
SNMP 2.6.532 UPDATED
Task Manager 7.0.351

All-In-One 200203 February 3, 2020

--- Core ---
JANOS 1.9 UPDATED

DCP 2.4 UPDATED

--- Bundled ---
FTP Client
MODBUS Server 1.7.236
Serial Control 5.0.122.1501
Serial To Ethernet 6.0.48
Slaving Service 1.5.1810.225
SNMP 2.4.1.494
Task Manager 7.0.351

All-In-One 190618 June 18, 2019

--- Core ---
JANOS 1.8
DCP 2.3

--- Bundled ---
FTP Client
MODBUS Server 1.7.236
Serial Control 5.0.122.1501
Serial To Ethernet 6.0.48
Slaving Service 1.5.1810.225
SNMP 2.4.1.494
Task Manager 7.0.351

One of the useful things about Tasker, is that it can include communicating with other devices within its tasks. This is possible by including a networks action, but before those actions can be used devices need to be added to a Tasker application. This post will explain how to create devices to be used in actions for tasks.

To start, we’ll begin by going to the devices tab of the Tasker application.

Device tab in Tasker

Here we can select the “Add Device” button which brings up a dialog box to add a device to the current workspace. 

Device dialog box in Tasker

In this dialog, two things need to be defined to create the device. This first value needed is the name of the device. The second value needed is the device type, which can either be an Ethernet or SNMP Device. Depending which Device type you choose changes the what information you can configure for the device after creating it.

Creating an Ethernet Device

If the Ethernet Device type was selected, the configurable option for the created device should look like this:

Ethernet Device example in Tasker

Two values of the Ethernet Device need configured in order to use it in a Task action, the IP Address and the TCP Port values. These need to be set to the IP Address and TCP Port values on the device, so that when they are used in actions, the JNIOR can properly communicate with the device. Another post has an example of using a TCP Send with an Ethernet Device.

Creating an SNMP Device

If the SNMP Device type was selected, the configurable option for the created device should look like this:

SNMP Device example in Tasker

Three values of the SNMP Device need configured in order to use it in a  Task action which are, the IP Address, the UDP Port, and the Community Name. These are needed for the JNIOR to connect to the SNMP Device and you obtain them from the SNMP Device. A different post shows how to use a SNMP Device with an SNMP Trap.

With this, you should have created devices in Tasker that can be implemented in actions.