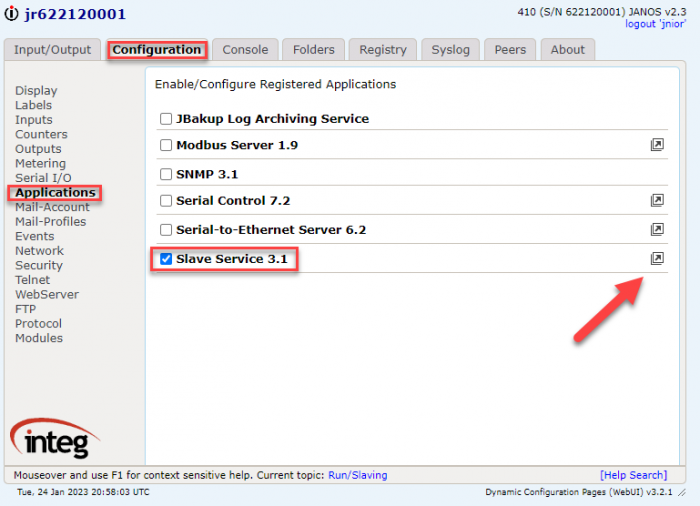
Slaving Service is one of the applications from the all-in-one update project that comes pre-installed on your JNIOR. You only need to enable the Slaving application to start on boot. You’ll need to restart the JNIOR for this to take affect. After the reboot, you can then access the Slaving Web page by clicking the pop out link to the right of the Slave Service.
The Application contains two tables, one for Inputs and one for Outputs. Each section contains 8 rows and 7 Columns.
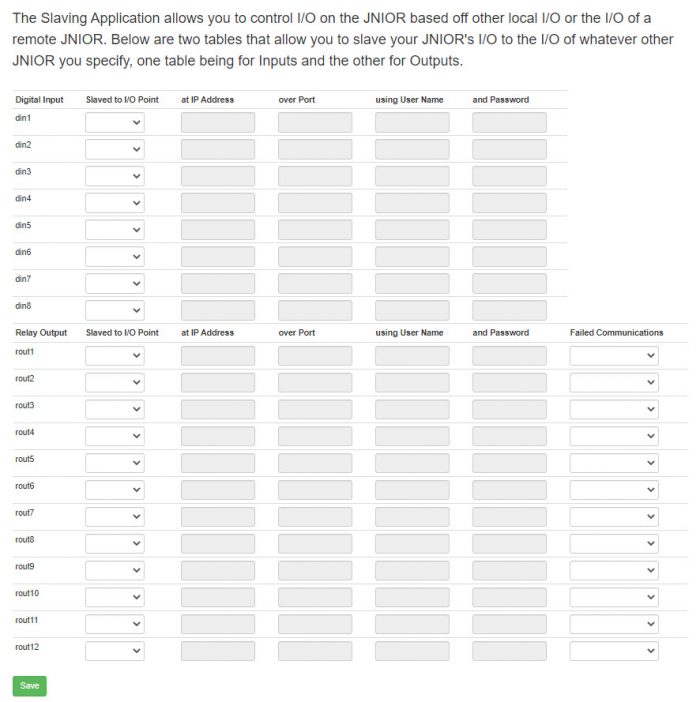
Each row in the first table represents a different Input on a JNIOR while the second table has each row represent a different Output.
As for the columns, the first column represents which Inputs or Outputs are getting slaved on the Local JNIOR you currently have open. Next the “Slaved to I/O Value” column is the I/O values on a remote JNIOR that each I/O value in the first column are slaved to.
After that, the “IP Address” column contains the IP Address of the remote JNIOR. If the “IP Address” value is set to “localhost”, the I/O on the unit are all being slaved locally. This means that if you were to slave Input 1 to Input 2 while the “IP Address” was set to “localhost”, Input 1 on your current JNIOR would activate when Input 2 on that unit activates. The “Over Port” column is the port number that the two JNIOR’s are connecting over. The connection made between two JNIORs use the JNIOR protocol to communicate. If the JNIOR protocol on your units are the default 9200 value this field can be left blank, but if you set a custom port number for the JNIOR protocol, that port number will need to be entered here.
The next two columns are the Username and Password which the remote JNIOR needs to login for the JNIOR protocol connection (Unless you changed your Username and Password, it should be “jnior” for both username and password). These values are not needed when slaving I/O locally (When using the “localhost” value for the IP Address for example).
Lastly is the “failed communication” column, which lets you set the state of the I/O value on the local JNIOR when it loses connection to the remote JNIOR. Lets say you have two JNIORs communicating using the Slaving Application. Output 1 on your slave JNIOR is slaved to Input 2 on the remote JNIOR, and you have “failed communication” set to “Relay On”. If the remote JNIOR were to reboot and the connection between the two JNIORs drop, since the “failed communication” value was set to “Relay On”, Output 1 on the slaved JNIOR will turn on until the connection is re-established between the two JNIORs.
Using these table values, you should be able control a local JNIOR’s I/O from a seperate remote JNIOR!